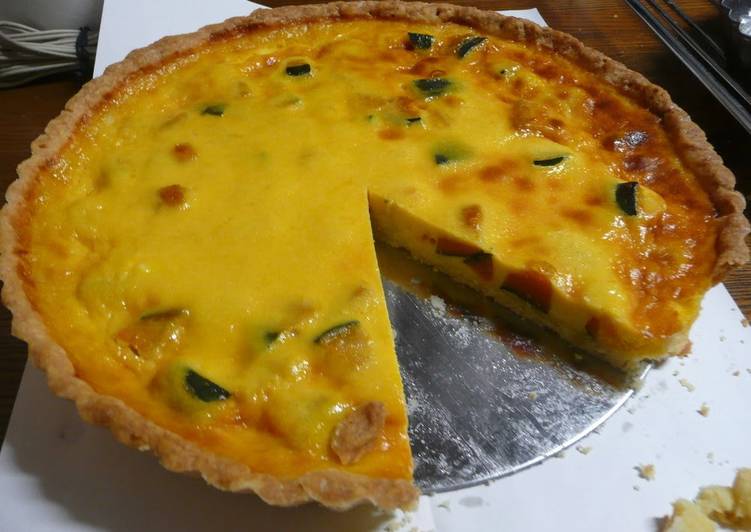
Hello everybody, hope you’re having an amazing day today. Today, I will show you a way to prepare a special dish, kabocha squash tart. It is one of my favorites food recipes. This time, I’m gonna make it a bit tasty. This will be really delicious.
Kabocha Squash Tart is one of the most well liked of recent trending foods in the world. It is appreciated by millions every day. It’s easy, it’s quick, it tastes delicious. They’re nice and they look wonderful. Kabocha Squash Tart is something which I’ve loved my entire life.
Kabocha squash, otherwise known as the Japanese pumpkin, is a green Kabocha squash does best outdoors. It needs room for the vine to spread out and space for the squash to bloom and develop. Roasted Kabocha Squash and Chickpea Salad with Tahini, Scallions and Black Sesame Seeds
To begin with this recipe, we have to first prepare a few ingredients. You can have kabocha squash tart using 12 ingredients and 12 steps. Here is how you can achieve that.
The ingredients needed to make Kabocha Squash Tart:
- Prepare For the tart crust:
- Get 80 grams Butter
- Get 40 grams Granulated sugar
- Take 1 Egg yolk
- Get 1/2 Coffee creamer
- Get 140 grams Cake flour
- Take For the filling:
- Take 200 grams Unpeeled kabocha squash (remove seeds)
- Get 200 ml Heavy cream
- Make ready 30 grams Granulated sugar
- Prepare 2 Beaten eggs
- Get 5 drops Vanilla extract
Kabocha squash, known as Japanese pumpkin is rich in vitamin A & C. Its benefits include skin care, improved vision, strong heart, & weight loss. Also know how to cook it. This video will show you how to correctly cut up a kabocha squash.
Steps to make Kabocha Squash Tart:
- Knead the butter into a paste. Add granulated sugar and mix until whitened.
- Now add the egg yolks and the coffee creamer (add in small batches to ensure it doesn't separate).
- Add the sifted flour into several batches. In cutting motion, fold in using a rubber spatula.
- When smooth, press and knead with your hands. Bring the dough together.
- Wrap in plastic wrap and chill for 30 minutes plus in the fridge.
- Remove seeds from the kabocha squash and dice into 1 cm cubes. Cover with plastic wrap and steam in the microwave.
- If using a microwave, 4 minutes at 700W. Or, use a steamer (don't simmer since it'll become watery). Set aside to cool.
- Grease a tart pan with butter and coat with cake flour. Chill in the fridge.
- Roll out the dough from Step 5. Press into the tart pan. Poke holes on the bottom with a fork.
- Line with aluminum foil and put in the pie weights. Bake for 10 minutes at 170℃.
- Set aside the baked crust to cool.
- Combine the kabocha (Step 7) and all ingredients for the filling in a bowl and mix everything together. Pour into the baked tart crust. Bake for 20 minutes at 180℃. It's done when it's golden brown.
It is the same technique to cut up a pumpkin or calabaza. You can also find lots more of. @hinterbergfarm сделал(-а) публикацию в своем аккаунте Instagram: "This made my Sunday: Kabocha Squash Tart w/Ricotta, Caramelized Onions and Sage. Recipe up…" Enjoy this tasty roasted stuffed kabocha squash recipe this holiday season. Everyone can enjoy this delicious dish. Kabocha squash, also known as Japanese pumpkin, has a thin but firm green skin and a bright vivid orange flesh.
So that’s going to wrap this up for this exceptional food kabocha squash tart recipe. Thanks so much for reading. I’m sure you will make this at home. There’s gonna be interesting food at home recipes coming up. Don’t forget to save this page on your browser, and share it to your loved ones, friends and colleague. Thank you for reading. Go on get cooking!